How to Use the BotDetect CAPTCHA Feature in SharePoint 2016 WebParts
After you deploy the BotDetect SharePoint CAPTCHA Feature to your SharePoint farm and activate it in a SharePoint web application, it will automatically add all of the necessary configuration to the web application's web.config that are required in order for the BotDetect Captcha control to work in a SharePoint site. This means that after activating the feature you can easily create your own web parts and application pages that utilize BotDetect Captcha protection in that farm.
These are the steps required to create a simple SharePoint 2016 WebPart which displays a Captcha test and checks that user input matches the displayed Captcha code. We will use C#, but please keep in mind that equivalent VB.NET code is very similar.
The Source Code of the Webpart described on this page is available for download here.
- Set up a SharePoint Web Part project
- Modify SharePoint Web Part code to display and validate the Captcha
- Build & deploy the Captcha-protected WebPart to SharePoint
Set up a SharePoint Web Part Project
- Start Visual Studio 2015
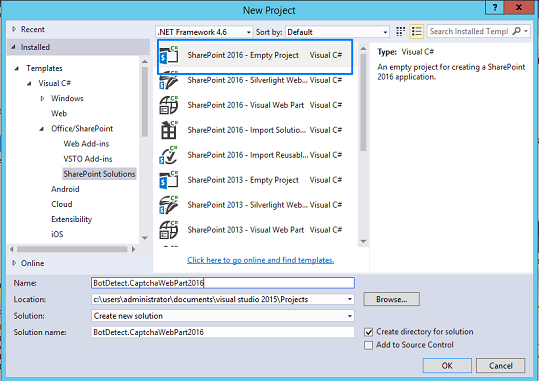
- Select File → New → Project
- From the Project Template Gallery select Visual C# → Office/SharePoint → SharePoint 2016 - Empty Project
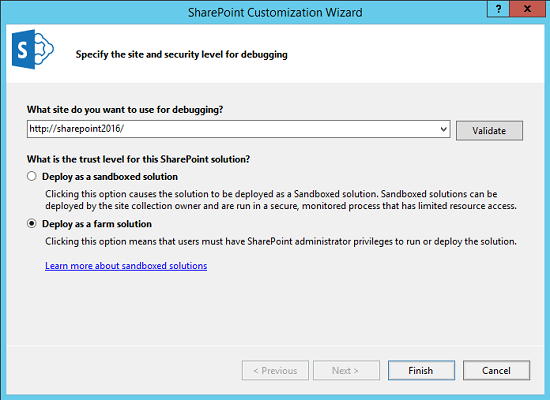
- At the SharePoint Customization Wizard screen, select:
Deploy as a farm solution - Specify the site that is a part of the web application in which you have activated the BotDetect SharePoint Captcha Feature
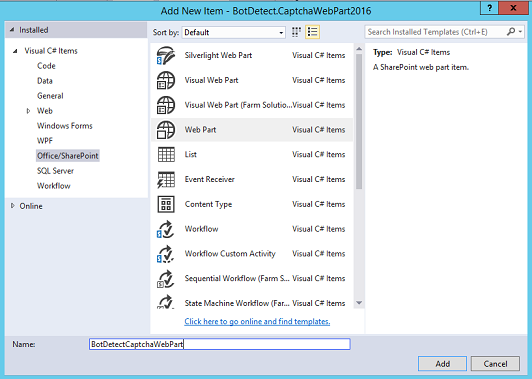
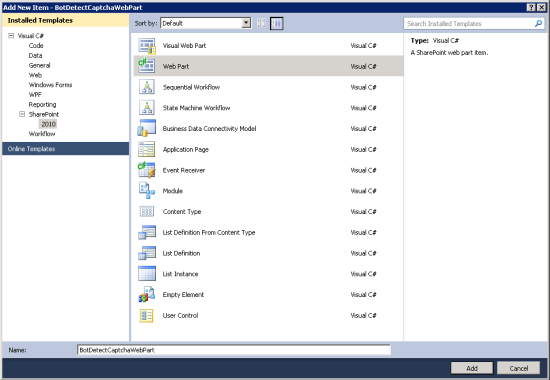
- Right-click your project from the Visual Studio Solution Explorer and select Add → New Item → WebPart
- Name the new WebPart BotDetectCaptchaWebPart
-
Right-click your project from the Visual Studio Solution Explorer and select References → Add reference, then browse to the
<BDC-DIR>/4.4.2/lgcy-on-lgcy/bin/BotDetect.dll.The
<BDC-DIR>is the root folder of the extracted BotDetect ASP.NET CAPTCHA Generator archive.
Note: There is no need to configure the deployment behavior for the BotDetect assembly because it was deployed with the BotDetect SharePoint Captcha Feature.
Modify SharePoint Web Part Code to Display and Validate the CAPTCHA
To add Captcha protection to the WebPart, we will use four controls:
- a BotDetect.Web.UI.Captcha control
- a TextBox for the Captcha code user input
- a Button invoking Captcha validation
- a Label displaying the Captcha validation result
When the Validate button is clicked and the form is submitted, user input is compared to the code displayed in the Captcha image.
In this simplified example, we just display the Captcha validation result. In a real-world scenario, the protected action (user registration, comment posting, email sending...) would only be performed if the Captcha test was passed.
The above can be achieved by adding the following C# code in the BotDetectCaptchaWebPart.cs file:
using System;
using System.ComponentModel;
using System.Web;
using System.Web.UI;
using System.Web.UI.WebControls;
using System.Web.UI.WebControls.WebParts;
using Microsoft.SharePoint;
using Microsoft.SharePoint.WebControls;

using BotDetect;
using BotDetect.Web;
using BotDetect.Web.UI;

namespace BotDetectCaptchaWebPart.BotDetectCaptchaWebPart
{
    [ToolboxItemAttribute(false)]
    public class BotDetectCaptchaWebPart : WebPart
    {
        protected override void CreateChildControls()
        {
            base.CreateChildControls();

            // create the Captcha control instance
            WebFormsCaptcha captchaControl = new WebFormsCaptcha();
            captchaControl.ID = "BotDetectCaptcha";
            // set Captcha locale; if you don't specify a locale,
            //  "en-US" will be used by default
            //captchaControl.Locale = "fr-CA"

            // create the user input textbox
            TextBox captchaCodeTextBox = new TextBox();
            captchaCodeTextBox.ID = "CaptchaCodeTextBox";
            captchaControl.UserInputID = "captchaCodeTextBox.ClientID;
            // create the button
            Button validateButton = new Button();
            validateButton.ID = "ValidateButton";
            validateButton.Text = "Validate";
            validateButton.Click +=
              new EventHandler(validateButton_Click);

            // create the Captcha validation result label
            Label messageLabel = new Label();
            messageLabel.ID = "MessageLabel";

            // add all controls to the WebPart
            this.Controls.Add(captchaControl);
            this.Controls.Add(captchaCodeTextBox);
            this.Controls.Add(validateButton);
            this.Controls.Add(messageLabel);
        }

        protected void validateButton_Click(object sender, EventArgs e)
        {
            // get control references
            WebFormsCaptcha captchaControl =
              (WebFormsCaptcha)this.FindControl("BotDetectCaptcha");

            TextBox captchaCodeTextBox =
              (TextBox)this.FindControl("CaptchaCodeTextBox");

            Label messageLabel =
              (Label)this.FindControl("MessageLabel");

            // get user input
            string captchaText =
              captchaCodeTextBox.Text.Trim();

            // clear user input, since each Captcha code
            // can only be validated once
            captchaCodeTextBox.Text = null;

            // validate the user input
            if (captchaControl.Validate(captchaText))
            {
                messageLabel.Text = "Success!";
            }
            else
            {
                messageLabel.Text = "Error!";
            }
        }
    }
}
Build & Deploy the CAPTCHA-protected Web Part to SharePoint
- Build the WebPart project
- Right-click your project in Solution Explorer and choose Deploy
- The built WebPart will be deployed to the SharePoint 2016 server instance
Current BotDetect Versions
-
BotDetect ASP.NET CAPTCHA
2019-07-22v4.4.2 -
BotDetect Java CAPTCHA
2019-07-22v4.0.Beta3.7 -
BotDetect PHP CAPTCHA
2019-07-22v4.2.5