How to Use the BotDetect CAPTCHA Feature in SharePoint 2007 WebParts
Using BotDetect CAPTCHA feature in SharePoint 2007 Web Part
This article describes steps for creating a SharePoint Web Part using the BotDetect ASP.NET CAPTCHA control. It is a very simple Web Part that allows you to validate user input, comparing it to the code shown in the CAPTCHA image.
Prerequisites
In this article we assume that you are running Visual Studio 2008 or 2010 (or newer) on a server running WSS (Windows SharePoint Services) or MOSS (Microsoft Office SharePoint Server) 2007.
Start by downloading the sample SharePoint CAPTCHA Web Part project. If you want to use this simplified Web Part example in your SharePoint website directly, you just have to build the project and follow steps 9-12.
Steps 1-8 describe how the example Web Part project was created, and you can follow them if you want to create your own CAPTCHA Web Part — and make any code changes your SharePoint projects might require.
Step 1: Creating a new Web Part Library project
In Visual Studio:
To create a Web Part, you need to add a reference to the Microsoft.SharePoint, System.XML and BotDetect (.NET 3.5) assemblies.
If you want to reference the BotDetect Captcha control from an anonymous SharePoint site's Bin folder, the IIS anonymous access user account (IUSR_<SERVER_NAME>) should be granted Readpermissions to Lanap.BotDetect.dll. Alternatively, you could reference the BotDetect.dll assembly from the GAC.
Step 2: Initial Project Settings
Before you start working with the code for a Web Part, you must make the following changes to your project settings:
To set the version number:
To strong-name the assembly:
Step 3: Adding namespace directives
- Add the following using directives near the top of your code:
- using Microsoft.SharePoint.WebPartPages;
using System.Xml.Serialization;
using System.Web.UI.HtmlControls;
using BotDetect; - using BotDetect.Web.UI;
Step 4: Defining Toolbox data
Replace the following line:
[ToolboxData("<{0}:ServerControl1 runat=server></{0}:ServerControl1>")]
with this line:
[ToolboxData("<{0}:BotDetectSimpleWebPart runat=server>")]
Step 5: Inheriting from the WebPart base class
Replace this line of code:
public class WebCustomControl1 : WebControl
with
public class BotDetectSimpleWebPart : WebPart
Step 6: Defining a XML namespace for the entire WebPart class
Add this line of code above the declaration for your WebPart class:
[XmlRoot(Namespace="BotDetectCaptchaWebPart2007")]
Step 7: Defining the Logic and Rendering of Your Web Part
After you complete the previous steps, you can define the logic and rendering for your Web Part.
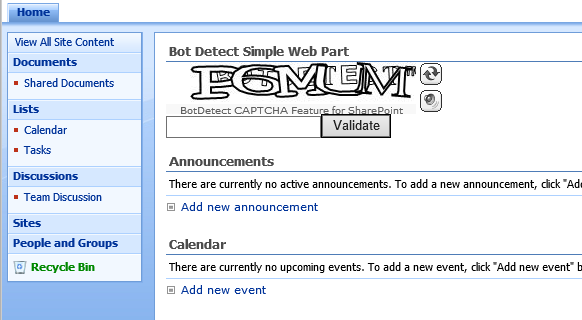
We are going to add a BotDetect.Captcha object (displaying the CAPTCHA image), a TextBox (entering the CAPTCHA code), a Button (invoking CAPTCHA validation), and a Label (displaying the CAPTCHA validation result).
using System;
using System.Collections.Generic;
using System.ComponentModel;
using System.Text;
using System.Web;
using System.Web.UI;
using System.Web.UI.WebControls;
using BotDetect;
using BotDetect.Web.UI;
using Microsoft.SharePoint.WebPartPages;
namespace BotDetectCaptchaWebPart2007
{
  [DefaultProperty("Text")]
  [ToolboxData("<{0}:BotDetectSimpleWebPart runat=server>")]
  public class BotDetectSimpleWebPart : WebPart
  {
    private TextBox _inputText;
    private Button _submitButton;
    private Label _messageLabel;
    private WebFormsCaptcha _captchaControl;

    protected override void CreateChildControls()
    {
      base.CreateChildControls();

      _captchaControl = new WebFormsCaptcha();
      _captchaControl.ID = "BotDetectCaptcha";

      _inputText = new TextBox();
      _inputText.ID = "InputText";
      _captchaControl.UserInputID = "_inputText.ClientID;
      _submitButton = new Button();
      _submitButton.ID = "SubmitButton";
      _submitButton.Text = "Validate";

      _submitButton.Click +=
        new EventHandler(submitButton_Click);

      _messageLabel = new Label();
      _messageLabel.ID = "MessageLabel";

      this.Controls.Add(_captchaControl);
      this.Controls.Add(_inputText);
      this.Controls.Add(_submitButton);
      this.Controls.Add(_messageLabel);
    }

    void submitButton_Click(object sender, EventArgs e)
    {
      string captchaText =
        ((TextBox)Controls[1]).Text.Trim();
      ((TextBox)Controls[1]).Text = null;

      if (_captchaControl.Validate(captchaText))
      {
        ((Label)Controls[3]).Text = "Success!";
      }
      else
      {
        ((Label)Controls[3]).Text = "Error!";
      }
    }
  }
}
Step 8: Creating a Web Part Definition File (.dwp)
A Web Part Definition file (.dwp) file is a simple XML file that contains property settings for a single Web Part. To import your Web Part into a Web Part Page, simply upload the .dwp file. After uploading the Web Part, you can display the Web Part by dragging it into one of the zones of the Web Part Page.
Two properties are required in the .dwp file: Assembly and TypeName. However, to display a default name and description for the Web Part after it is imported, you should also include the Title and Description properties. If you want to set other Web Part properties during import, you can also define them in a .dwp file. A .dwp file takes the following form:
<?xml version="1.0"?>
<WebPart xmlns="http://schemas.microsoft.com/WebPart/v2">
   <Assembly>AssemblyName(with no .dll extension),
      Version=VersionNumber, Culture=Culture,
      PublicKeyToken=PublicKeyToken</Assembly>
   <TypeName>WebPartNamespace.WebPartClassName</TypeName>
   <Title>DefaultWebPartTitle</Title>
   <Description>WebPartDescription</Description>
</WebPart>
Your Web Part's .dwp part should look like this one:
<?xml version="1.0"?>
<WebPart xmlns="http://schemas.microsoft.com/WebPart/v2">
  <Assembly>BotDetectCaptchaWebPart2007, Version=1.0.0.0, Culture=Neutral,
    PublicKeyToken=5ea8ae17e5cc573f</Assembly>
  <TypeName>BotDetectCaptchaWebPart2007.BotDetectSimpleWebPart</TypeName>
  <Title>Bot Detect Simple Web Part</Title>
  <Description>This web part shows BotDetect
    Captcha image and validates user input</Description>
</WebPart>
Step 9: Register a Web Part assembly as a SafeControl
Step 10: Registering Http Handlers & Modules
You can download a example web.config file here.
Step 11: Deploying Your Web Part
To deploy your Web Part to a SharePoint site, copy your web part's assembly to the global assembly cache folder at C:\windows\assembly.
Step 12: Importing Your Web Part into a Web Part Page
To use and test your Web Part, import it into a Web Part Page on a server running WSS (Windows SharePoint Services) or MOSS (Microsoft Office SharePoint Server) 2007.
Current BotDetect Versions
-
BotDetect ASP.NET CAPTCHA
2019-07-22v4.4.2 -
BotDetect Java CAPTCHA
2019-07-22v4.0.Beta3.7 -
BotDetect PHP CAPTCHA
2019-07-22v4.2.5